Embarking on your first camper adventure is an exciting step toward freedom, exploration, and the great outdoors. As you get ready to hit the road, you’ll quickly realize that comfort outside your camper is just as important as what’s inside. That’s where camper awnings come in. They transform the area next to your vehicle into a shaded, weather-protected zone where you can relax, dine, or simply enjoy the view. If you’re new to the world of mobile travel and want to learn more about essential gear, click here for helpful tips and product recommendations. visit website
In this guide, we’ll cover the basics of camper awnings—what they are, the different types available, and what to consider before making your first purchase. Whether planning short weekend getaways or extended cross-country trips, understanding awnings will help you travel smarter and more comfortably.
What Camper Awnings Do for You
At first glance, an awning is a simple accessory. But it quickly becomes one of the most appreciated features for anyone who’s spent time in a camper. A camper awning creates shade during sunny afternoons, protection during light rain, and a visual boundary that expands your living space outdoors.
It’s your outdoor living room—ideal for morning coffee, al fresco meals, reading in the afternoon breeze, or entertaining fellow travelers. The extra shelter also helps keep the inside of your camper cooler by blocking direct sunlight from windows and doors.
Main Types of Camper Awnings
Camper awnings come in several styles, each with advantages depending on your setup and travel habits.
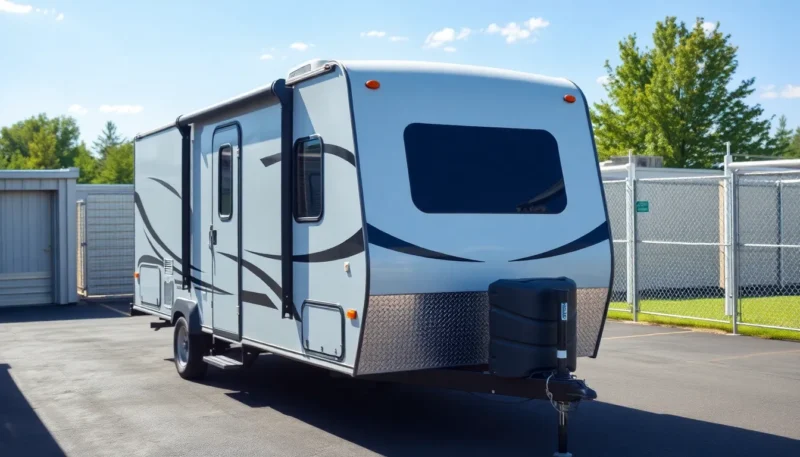
Roll-out awnings are popular for their simplicity and ease of use. They attach to the side of your camper and can be extended manually or with an electric motor. These are the most common types for RVs and travel trailers.
Canopy-style awnings are freestanding and usually supported by poles and guy lines. These are versatile and lightweight, making them a great option for vans, teardrop trailers, and smaller campers.
Slide-out awnings are mounted above the camper’s slide-out sections. They protect the top from rain, leaves, and debris, preventing long-term wear or potential leaks.
Window and door awnings are smaller coverings placed over specific areas of the camper to reduce heat gain and rain intrusion.
Each style has its purpose, and many seasoned travelers end up using a combination to suit different environments and needs.
Key Features to Consider
Before buying an awning, it helps to understand the key features that can improve your experience on the road.
Material matters when it comes to durability and performance. Vinyl is waterproof and easy to clean, making it suitable for wet climates. Acrylic is breathable and handles sun exposure well, staying cooler on hot days.
Frame construction affects how well your awning handles wind and wear. Aluminum frames are lightweight and rust-resistant, while steel offers extra strength but adds more weight.
Manual versus electric operation depends on your comfort with the setup. Manual awnings are straightforward and reliable, but electric options offer convenience and faster deployment, especially helpful for solo travelers.
Adjustable pitch is a useful feature that allows you to tilt the awning to guide rainwater off one side. This prevents water from pooling on top and reduces strain on the fabric.
Built-in LED lighting or compatible add-on lighting strips can extend your awning use into the evening without needing extra lanterns.
Setup and Safety Tips for First-Time Use
If you’ve never used an awning, setup can initially feel intimidating, but it quickly becomes second nature with some practice.
Start by choosing a flat, stable spot to park. Uneven ground can make it difficult to secure awning poles and tie-downs. Always read your awning’s instruction manual to ensure you use the proper steps for extending and locking it into place.

Once the awning is out, secure it properly. Sudden gusts can damage an unsecured awning even if the weather is calm. Use tie-down straps and ground stakes to add stability.
Keep an eye on the forecast. It’s best to retract your awning during heavy winds or storms. Some advanced models have wind sensors that automatically pull the awning in for protection.
When packing up, ensure the fabric is completely dry before retracting. Rolling up a damp awning can lead to mold, mildew, and unpleasant odors. If you must put it away wet, unroll it as soon as possible to let it dry thoroughly.
Making the Most of Your Awning Space
Think of your awning space as a flexible outdoor room. Add a weatherproof mat to define the area and keep dirt from tracking inside the camper. Foldable furniture, string lights, and a small side table can instantly make it welcoming.

Some travelers use mesh side panels or screen rooms to create privacy and keep bugs out, especially in wooded or humid areas. This turns your awning into a screened-in porch—perfect for working remotely, eating without flies, or enjoying the breeze in comfort.
For campers who stay in one spot for extended periods, awning accessories like sunshades, organizers, or hanging planters can add a personal touch to your mobile home.
Your first camper trip is full of learning moments, and getting familiar with your awning is one of them. With the proper setup and care, a camper awning will become one of your most-used—and most appreciated—travel companions. It extends your space, adds comfort to every stop, and brings a bit of home to wherever you roam.
Let your awning be the welcome mat to every new horizon.